原本今天打算開始寫Linux scheduler的部分,但是一看src code之後發現跟之前看的src code與教科書1有很大的出入,傳說中的O(1) scheduler早已不復存在,於是決定好好研究一下再下筆。看著看著發現一個新的資料結構,名為struct cfs_rq cfs,Google之後大概知道它的作用,也找到了一個有趣的blog2,有趣的部分在於它的comment。
PS. 這時候前恩師的話在腦中響起"src code在眼前為什麼不看而要相信書上寫的呢?"。
1 大名鼎鼎的Understanding Linux Kernel與Linux Kernel Development。
2 http://
Search Google
Wednesday, June 25, 2008
Linux scheduler大改版
Tuesday, June 24, 2008
[Process Management] Process/Thread Termination Part 2
專門用語:
- 使用打字機(Courier New)字體表示原始碼。
- task/process即為Linux中的thread。
- 文中的Linux與Linux kernel指的皆為作業系統核心。
- 使用斜體字型標示Linux中的資料結構,macro,變數或函式名稱。
- PID即為TID。
Kernel版本:
- v2.6.24.3
What does do_exit do?
按照正常的邏輯推理,當一個thread執行結束後作業系統需要做的事情包含將thread標示為離開作業環境,將thread佔用的資源釋出,例如檔案、lock、thread與descriptor的記憶體空間等。現在就來看看do_exit函式究竟做了哪些事情。
當一個thread執行結束之後do_exit函式會先將PF_EXITING寫入該thread task_struct的flags欄位。經過一些house keeping work之後透過exit_mm函式呼叫mmput函式將該thread所使用的記憶體空間與其descriptor釋出。
void mmput(struct mm_struct *mm)
{
        might_sleep();

        if (atomic_dec_and_test(&mm->mm_users)) {
                exit_aio(mm);
                exit_mmap(mm);
                if (!list_empty(&mm->mmlist)) {
                        spin_lock(&mmlist_lock);
                        list_del(&mm->mmlist);
                        spin_unlock(&mmlist_lock);
                }
                put_swap_token(mm);
                mmdrop(mm);
        }
}
接著釋出的是該thread使用的檔案,透過__exit_files函數呼叫put_files_struct函數將檔案關閉並且釋出descriptor空間,而接下來的__exit_fs函式則是用來釋出檔案系統中規劃給剛剛關閉的檔案用的cache。
static void __exit_files(struct task_struct *tsk)
{
        struct files_struct * files = tsk->files;

        if (files) {
                task_lock(tsk);
                tsk->files = NULL;
                task_unlock(tsk);
                put_files_struct(files);
        }
}
static void __exit_fs(struct task_struct *tsk)
{
        struct fs_struct * fs = tsk->fs;

        if (fs) {
                task_lock(tsk);
                tsk->fs = NULL;
                task_unlock(tsk);
                __put_fs_struct(fs);
        }
}
資源釋出完畢之後便呼叫exit_thread函式移除該thread使用的I/O bitmap與TSS1。
void exit_thread(void)
{
        /* The process may have allocated an io port bitmap... nuke it. */
        if (unlikely(test_thread_flag(TIF_IO_BITMAP))) {
                struct task_struct *tsk = current;
                struct thread_struct *t = &tsk->thread;
                int cpu = get_cpu();
                struct tss_struct *tss = &per_cpu(init_tss, cpu);

                kfree(t->io_bitmap_ptr);
                t->io_bitmap_ptr = NULL;
                clear_thread_flag(TIF_IO_BITMAP);
                /*
                 * Careful, clear this in the TSS too:
                 */
                memset(tss->io_bitmap, 0xff, tss->io_bitmap_max);
                t->io_bitmap_max = 0;
                tss->io_bitmap_owner = NULL;
                tss->io_bitmap_max = 0;
                tss->x86_tss.io_bitmap_base = INVALID_IO_BITMAP_OFFSET;
                put_cpu();
        }
}
接著呼叫exit_notify函式告知作業系統中其他的threads有thread執行完畢要離開,exit_notify函式最主要的功用是通知該thread的parent與children threads,並將其children threads過戶給其他thread作為他們新的parent。exit_notify函式呼叫forget_original_parent函式將children threads過戶給同一個thread group的其他thread,若thread group只有執行結束的那個thread則將children threads過給kernel_init thread。
do {
        reaper = next_thread(reaper);
        if (reaper == father) {
                reaper = task_child_reaper(father);
                break;
        }
} while (reaper->flags & PF_EXITING);
...
list_for_each_entry_safe(p, n, &father->ptrace_children, ptrace_list) {
        p->real_parent = reaper;
        reparent_thread(p, father, 1);
}
處理完children threads之後輪到通知parent,將exit_signal設為SIGCHLD讓parent知道該thread已經執行完畢。
if (tsk->exit_signal != SIGCHLD && tsk->exit_signal != -1 &&
    ( tsk->parent_exec_id != t->self_exec_id  ||
      tsk->self_exec_id != tsk->parent_exec_id)
    && !capable(CAP_KILL))
        tsk->exit_signal = SIGCHLD;
exit_notify函式最後將該thread的狀態改為EXIT_ZOMBIE讓Linux知道有thread執行完畢2並且可以將該thread移除,同時確保該thread在被Linux移除之前不會再被挑選出來執行。執行完exit_notify函式之後do_exit函式將執行結束的thread的狀態再改為TASK_DEAD才呼叫schedule函式,將狀態改為TASK_DEAD的用意是讓稍後的schedule函式可以透過context_switch函式呼叫finish_task_switch函式中的put_task_struct函式移除該thread的task_struct。
tsk->state = TASK_DEAD;

schedule();
static void finish_task_switch(struct rq *rq, struct task_struct *prev)
        __releases(rq->lock)
{
        struct mm_struct *mm = rq->prev_mm;
        long prev_state;

        rq->prev_mm = NULL;

        /*
         * ...
         */
        prev_state = prev->state;
        finish_arch_switch(prev);
        finish_lock_switch(rq, prev);
        fire_sched_in_preempt_notifiers(current);
        if (mm)
                mmdrop(mm);
        if (unlikely(prev_state == TASK_DEAD)) {
                /*
                 * ...
                 */
                kprobe_flush_task(prev);
                put_task_struct(prev);
        }
}
明明在呼叫schedule函式之前已經明確將狀態改為TASK_DEAD為什麼最後一個判斷式裡面要用unlikely?因為完成context switch的thread不一定執行完畢,而與正常執行被context switch的次數比起來執行完畢所占的context switch次數少太多了3,所以使用unlikely預測大部分時候是不成立的以節省branching所需的時間。
1 TSS存放的是每個thread被context switch時所需要的資訊,會於稍後的memory management介紹。
2 包含釋出所有佔用的資源。
3 每個thread只會結束一次而已,但是會被context switch很多次,time slice的range為數十ms到數百ms,稍後在討論schedule的時候會加以介紹。
Sunday, June 22, 2008
More on LXR -- The partial use of hosts file
今天再來討論一下有關LXR的議題。
當我們編輯lxrng.conf的時候會指定base_url,如果裡面填寫的是domain name則其他在同樣LAN的電腦可能會無法開啟LXR網頁,這時候我們需要在瀏覽端電腦上設定hosts檔案,hosts檔案在Linux與Winows下的路徑分別為:
Linux --> /etc/hosts
Windows --> C:\WINDOWS\system32\drivers\etc\hosts
在裡面加上:
LXR機器的IP1 LXR機器的domain name
如此一來不論瀏覽端電腦是否在LAN2都可以使用LXR機器的domain name開啟LXR頁面。
1 甚至"localhost"也可以
2 包括LXR本機
Friday, June 20, 2008
[Process Management] Process/Thread Termination Part 1
專門用語:
- 使用打字機(Courier New)字體表示原始碼。
- task/process即為Linux中的thread。
- 文中的Linux與Linux kernel指的皆為作業系統核心。
- 使用斜體字型標示Linux中的資料結構,macro,變數或函式名稱。
Kernel版本:
- v2.6.24.3
有關thread termination有兩件事情需要確認,一是kernel thread與user thread結束的步驟是否相同(Part 1),二是他們結束的步驟各1為何(Part 2)。
講到thread termination讓人立即想到的就是程式執行(user thread)完畢,user thread通常是因執行應用程式的可執行檔而產生,而compiler在編譯應用程式可執行檔的過程中會在程式最後加上exit函式,該函式會透過system call sys_exit讓Linux結束並移除該應用程式(user thread)[1],實際上sys_exit函式就等於do_exit函式。
asmlinkage long sys_exit(int error_code)
{
        do_exit((error_code&0xff)<<8);
}
雖然說kernel thread通常在關機(或重新開機)前是不會停止運作2,kernel thread一旦執行完畢3還是會跟user thread走相同的步驟呼叫do_exit函式,詳見下圖。

以上說明了Linux透過相同的do_exit函式移除束完畢的kernel thread與user thread。
1 如果結束步驟不同再分別探討。
2 Kernel thread大部分都是用於維持電腦正常運作,因此都會以無窮回圈方式執行,但如果是由driver所建立的kernel thread就有可能在某些時候遭到停止甚至移除。
3 離開無窮回圈或根本就沒有回圈存在。
4 於rest_init函式中呼叫,確定一些基本硬體設定都已初始完成。
5 分別為"hello world"與"leaving now"。
[1] Linux Kernel Development, Robert Love, DEVELOPER'S LIBRARY
http://www.amazon.com/exec/obidos/tg/detail/-/0672327201/ref=lpr_g_1/104-4939002-4103159?v=glance&s=books&n=507846
[Process Management] Process/Thread Creation Part 3
專門用語:
- 使用打字機(Courier New)字體表示原始碼。
- task/process即為Linux中的thread。
- 文中的Linux與Linux kernel指的皆為作業系統核心。
- 使用斜體字型標示Linux中的資料結構,macro,變數或函式名稱。
- v2.6.24.3
- 都會呼叫do_fork函式建立task_struct,task_thread_info,與堆疊空間。
- 新建立的thread的狀態都是可以執行,但不一定馬上被執行。
- 傳入do_fork的數性參數不同,就連產生user thread的三個函式1本身傳入的屬性參數都不同。
- 產生kernel thread時新thread要執行的函式已經存在記憶體中,因此可以直接將函數指標存入暫存器2,而產生user thread時Linux需要先呼叫sys_execve函式讀取存放於硬碟的執行檔並將內容放入記憶體中再將函式指標存入暫存器。
- TASK_RUNNING:擁有此狀態的thread是被放在runqueue中,隨時有可能被scheduler選出來執行。
- TASK_INTERRUPTIBLE:擁有此狀態的thread並不存在於runqueue中,只有在等待的條件成立或是接收到signal時才會被重新放入runqueue成為可執行的thread。
- TASK_UNINTERRUPTIBLE:與擁有TASK_INTERRUPTIBLE狀態的thread一樣不存在於runqueue中並等待條件成立,但是該thread並不會因為接收到signal4而被重新放入runqueue等待執行。
- EXIT_ZOMBIE:當一個thread執行完畢但是它的task_struct,task_thread_info與堆疊空間還存在於記憶體中的時候該thread便是此狀態,因此runqueue中當然也找不到該thread。
- TASK_STOPPED:這個狀態表示一個thread的運行因接收到signal而遭到停止,最好的例子便是進入GDB除錯模式的thread。
 上圖中的TASK_ZOMBIE在2.6.24.3裡面其實就是EXIT_ZOMBIE。
以下是thread狀態的define值:
#define TASK_RUNNING            0
#define TASK_INTERRUPTIBLE      1
#define TASK_UNINTERRUPTIBLE    2
#define TASK_STOPPED            4
#define TASK_TRACED             8
/* in tsk->exit_state */
#define EXIT_ZOMBIE             16
#define EXIT_DEAD               32
/* in tsk->state again */
#define TASK_DEAD               64
當thread被標示為TASK_TRACED狀態時表示該thread正在被其parent使用ptrace5觀察它的運行,至於EXIT_DEAD與TASK_DEAD狀態就等我們探討Linux如何移除執行完畢的thread時再好好觀察他們的作用各是什麼。接下來我們要討論當thread進入EXIT_ZOMBIE狀態之後Linux是如何將它移除。
1 sys_fork,sys_vfork,與sys_clone。
2 此指新thread存放暫存器的資料結構,當scheduler挑選新thread執行之前該資料結構中的暫存器內容全部都會被放進真實的暫存器中。
3 紀錄於task_struct中的state欄位。
4 應該說是完全感受不到signal的存在。
5 可以把它看作debug工具的一種(http://linux.about.com/library/cmd/blcmdl2_ptrace.htm )。
Thursday, June 19, 2008
[Process Management] Process/Thread Creation Part 2
專門用語:
- 使用打字機(Courier New)字體表示原始碼。
- task/process即為Linux中的thread。
- 文中的Linux與Linux kernel指的皆為作業系統核心。
- 使用斜體字型標示Linux中的資料結構,變數或函式名稱。
Kernel版本:
- v2.6.24.3
User thread:
應用程式使用fork,vfork,或clone函式建立新的user threads,這些函式分別透過Linux system call呼叫sys_fork,sys_vfork,或sys_clone kernel function建立新threads,而sys_fork,sys_vfork,與sys_clone共同呼叫的函式為do_fork1。
asmlinkage int sys_fork(struct pt_regs regs)
{
return do_fork(SIGCHLD, regs.esp, ®s, 0, NULL, NULL);
}
asmlinkage int sys_clone(struct pt_regs regs)
{
unsigned long clone_flags;
unsigned long newsp;
int __user *parent_tidptr, *child_tidptr;
clone_flags = regs.ebx;
newsp = regs.ecx;
parent_tidptr = (int __user *)regs.edx;
child_tidptr = (int __user *)regs.edi;
if (!newsp)
newsp = regs.esp;
return do_fork(clone_flags, newsp, ®s, 0, parent_tidptr, child_tidptr);
}
asmlinkage int sys_vfork(struct pt_regs regs)
{
return do_fork(CLONE_VFORK | CLONE_VM | SIGCHLD, regs.esp, ®s, 0, NULL, NULL);
}
上面三個函式都只為新thread準備好task_struct,task_thread_info,與堆疊空間,至於新的thread該執行哪些程式碼則毫無著墨。應用程式一般以呼叫執行檔的方式啟動2,便是將執行檔的binary內容讀取到記憶體中執行,這個步驟則是透過sys_execve函式呼叫do_execve函式完成,因此一般建立新user thread時sys_execve會搭配於task_struct,task_thread_info,與堆疊空間建制完成之後執行將執行檔載入記憶體。
asmlinkage int sys_execve(struct pt_regs regs)
{
int error;
char * filename;
filename = getname((char __user *) regs.ebx);
error = PTR_ERR(filename);
if (IS_ERR(filename))
goto out;
error = do_execve(filename,
(char __user * __user *) regs.ecx,
(char __user * __user *) regs.edx,
®s);
if (error == 0) {
task_lock(current);
current->ptrace &= ~PT_DTRACE;
task_unlock(current);
/* Make sure we don't return using sysenter.. */
set_thread_flag(TIF_IRET);
}
putname(filename);
out:
return error;
}
1 kernel_thread最後也是呼叫do_fork。
2 例如開啟Firefox網頁瀏覽器。
Tuesday, June 17, 2008
[Process Management] Process/Thread Creation Part 1
專門用語:
- 使用打字機(Courier New)字體表示原始碼。
- task/process即為Linux中的thread。
- 文中的Linux與Linux kernel指的皆為作業系統核心。
- 使用斜體字型標示Linux中的資料結構,變數或函式名稱。
- PID即為TID。
Kernel版本:
- v2.6.24.3
今天要研究的課題是作業系統中每個在跑的process是怎麼來的?因為process可分為kernel thread與user thread,所以接下來會分兩個部分討論產生kernel thread(Part 1)與user thread(Part 2)的流程,最後比較這兩個流程之間的同異之處與補充說明(Part 3)。
Kernel thread:
建立kernel thread需要呼叫的kernel function為kernel_thread。呼叫kernel_thread時需要傳入三個變數,分別為指到執行函式的指標,指到執行函式所需參數的指標,以及新thread的屬性。於kernel_thread執行完畢時會回傳新thread的識別號碼(PID),此時新產生的thread還沒有開始運行而是被放在工作佇列(runqueue)中直到kernel呼叫schedule1。
int kernel_thread(int (*fn)(void *), void * arg, unsigned long flags)
{
struct pt_regs regs;
memset(®s, 0, sizeof(regs));
regs.ebx = (unsigned long) fn;
regs.edx = (unsigned long) arg;
regs.xds = __USER_DS;
regs.xes = __USER_DS;
regs.xfs = __KERNEL_PERCPU;
regs.orig_eax = -1;
regs.eip = (unsigned long) kernel_thread_helper;
regs.xcs = __KERNEL_CS | get_kernel_rpl();
regs.eflags = X86_EFLAGS_IF | X86_EFLAGS_SF | X86_EFLAGS_PF | 0x2;
/* Ok, create the new process.. */
return do_fork(flags | CLONE_VM | CLONE_UNTRACED, 0, ®s, 0, NULL, NULL);
}
從上面這段程式碼可以看到kernel_thread做了兩件事:先為新thread準備工作環境2再以使用者傳入的參數為依據產生新的thread,Linux使用do_fork函式產生thread。do_fork函式間接透過copy_process函式呼叫dup_task_struct函式為新thread規劃堆疊空間並建立task_struct與task_thread_info。若是沒有發生任何錯誤kernel_thread函式會透過do_fork函式將新thread的PID回傳給使用者3,要特別注意的是到目前為止沒有任何一個動作讓新thread開始運作,do_fork函式最多4只呼叫wake_up_new_task函式將新thread放入runqueue中等待scheduler將其挑出執行,因此新thread此時只不過是runqueue中的一個等待執行的task。
除了kernel_thread函式之外kthread_create函式也可以建立新thread,不同的是kthread_create會延遲新thread的產生,它將有關新thread的資訊放入kthread_create_list然後讓kthreadd_task5分別為kthread_create_list中所存放的各個資訊建立相對應的新thread,而kthreadd_task最後還是透過create_kthread函式使用kernel_thread函式建立新thread。
1 呼叫schedule僅代表任何thread都有可能被挑出來執行,並不表示新產生的thread一定會馬上被挑到。
2 這裡所準備的registers就是讓一個thread正常運作的最基本資訊,也是之前討論過的task_struct基本要素。
3 使用者此時編輯的是kernel mode程式碼,包含kernel的功能或module。
4 建立新thread時可以使用CLONE_STOPPED參數讓新thread不要馬上進入runqueue。
5 kthreadd_task與kernel_init為Linux開機最末段所產生的兩支kernel threads,kthreadd_task是用來非同步產生thread(多的那個"d"應該代表著daemon的意思,不是typo喔!),而kernel_init則是從開機程序切入使用者介面(eg. bash)的關鍵。
Friday, June 13, 2008
Another browse/trace code tool -- GNU Global
話說前幾天介紹了trace code利器LXR與cscope之後今天又發現了另外一個不錯的工具 -- GNU Global[1],他算是結合了LXR與cscope的優點:
+ 可以產生能夠使用網頁瀏覽的tags
+ 產生的方式十分簡單,不需要像使用LXR一樣要編寫設定檔,請參考tutorial[2]
+ 在原始碼的root directory建立完tags之後在任何子目錄中都能夠搜尋關鍵字/definition
+ 網頁版本的tags可以隨意移動至任何路徑下(例如/var/www)
缺點有:
- 沒有類似LXR提供的usage功能,因此當某definition在多個檔案中出現時,我們只能從搜尋結果中猜測目前檔案中的definition究竟來自於何處(cscope也有此缺點)。
- 花很多時間產生tags(與LXR所需的時間不相上下)
如果在自行產生之前想先看看demo,可以連到以下的連結看看:
http://www.tamacom.com/tour/kernel/linux/
[1] http://www.gnu.org/software/global/global.html
[2] http://www.gnu.org/software/global/globaldoc_toc.html
Thursday, June 12, 2008
[Process Management] task_struct中存放哪些關鍵資訊?
專門用語:
- 使用打字機(Courier New)字體表示原始碼。
- task/process即為Linux中的thread。
- 文中的Linux與Linux kernel指的皆為作業系統核心。
- 使用斜體字型標示Linux中的資料結構,變數或函式名稱。
- PID即為TID。
Kernel版本:
- v2.6.24.3
佔了1.7KBytes記憶體空間的task_struct可以存放許多資訊,其中包含許多對保持作業系統正成運作而言並非必要1的資訊,如統計或其他功能數據utime,stime,utimescaled,stimescaled。。。等。究竟哪些才是會影響task運作的關鍵資訊呢?讓我們看看Linux在呼叫工作排程將current task暫停而開始執行另一個task(稱之為context switch)之前保存哪些資訊。Linux的工作排程函式叫做schedule,真正發生context switch的部分出現在switch_to macro中,switch_to在執行context switch(jmp __switch_to)之前先將CPU暫存器中的值存到current task的task_struct中:
eip為program counter,有關esp,ebp的作用請參考orca大大(orca dot chen at gmail dot com)的comment。
#define switch_to(prev,next,last) do {                                  \
unsigned long esi,edi;                                          \
asm volatile("pushfl\n\t"               /* Save flags */        \
            "pushl %%ebp\n\t"                                  \
            "movl %%esp,%0\n\t"        /* save ESP */          \
            "movl %5,%%esp\n\t"        /* restore ESP */       \
            "movl $1f,%1\n\t"          /* save EIP */          \
            "pushl %6\n\t"             /* restore EIP */       \
            "jmp __switch_to\n"                                \
            "1:\t"                                             \
            "popl %%ebp\n\t"                                   \
            "popfl"                                            \
            :"=m" (prev->thread.esp),"=m" (prev->thread.eip),  \
             "=a" (last),"=S" (esi),"=D" (edi)                 \
            :"m" (next->thread.esp),"m" (next->thread.eip),    \
             "2" (prev), "d" (next));                          \
} while (0)
有 了這些暫存器中的資訊,當下次發生context switch恢復某個被暫停執行的task時,Linux可以知道該從記憶體的哪個位址繼續執行,並知道該task該從什麼狀態繼續執行,因為task使 用到的區域變數都存放在堆疊中。少了這些核心資料多工作業環境絕對無法正常運作,然而為了增加核心的運作效能task_struct中因而存放其他資訊,如state,pid,prio,static_prio,normal_prio。。。等。
Wednesday, June 11, 2008
[Process Management] 如何找到current task的task_struct?
專門用語:
- 使用打字機(Courier New)字體表示原始碼。
- task/process即為Linux中的thread。
- 文中的Linux與Linux kernel指的皆為作業系統核心。
- 使用斜體字型標示Linux中的資料結構,變數或函式名稱。
Kernel版本:
- v2.6.24.3
以task_struct為關鍵字使用LXR[1]進行搜尋後會發現有許多類似下面這行程式碼:
struct task_struct *xxx = current;
因此我們再繼續搜尋current,便發現current其實是個macro:
#define current get_current()
而get_current函式的回傳值為current_task亦即指到current task的task_struct的指標:
return x86_read_percpu(current_task);
因此藉由直接呼叫current便可取得current task的task_struct。
在兩種時機下current_task會被更新,開機時與Linux讓CPU執行另一個task之前。
開機的過程中current_task存放著作業系統中第一個thread init_task的task_struct的位址:
DEFINE_PER_CPU(struct task_struct *, current_task) = &init_task;
在Linux讓CPU執行另一個task之前會間接呼叫到__switch_to函式,此函式把將被執行的task的task_struct位址存入current_task:
x86_write_percpu(current_task, next_p);
在2.6.22以後的kernel中才以此方法取得current task的task_struct,與之前使用堆疊指標計算出task_struct的相對位址的方法相比節省了不少計算位址所需的時間。利用堆疊指標的方法為先呼叫先呼叫current_thread_info取得thread_info:
return (struct thread_info *)(current_stack_pointer & ~(THREAD_SIZE - 1));
再透過thread_info裡的task取得task_struct:
struct thread_info {
   struct task_struct *task; /* main task structure */
   ....
}
在2.4以前的kernel中直接將task_struct存放於堆疊的最下方1並沒有使用thread_info轉介,2.6以後的kernel才引入thread_info節省堆疊空間2,thread_info佔約60Bytes的記憶體空間與task_struct佔約1.7KBytes比較起來小了不少。
1 最後被碰到的區域,以x86架構為例則是位址最小的區域。
2 堆疊空間僅有8K或4KBytes,取決於編譯Linux kernel時的設定。
[1] http://lxr.linux.no/ 或是參考之前文獻所自行產生的cross reference
Linux的主要構成要素
專門用語
- 文中提及的task,thread,task與process都代表著運行於Linux的thread。
- 文中的Linux與Linux kernel指的皆為作業系統核心。
- 使用斜體字型標示Linux中的資料結構,變數或函式名稱。
- PID即為TID。
Linux與所有的作業系統核心一樣必須管理硬體資源以在現今的電腦世界中提供多工的作業環境。提到多工作業環境,Linux要能夠在任何時刻於所有正在運行的threads中找出特定的某個thread才能透過kernel function schedule的協助讓每個thread都被執行到。因此Linux使用名為task_struct的資料結構存放用以區分各個thread的資訊(稱之為特徵或finger print)1。
當我們更進一步區分threads時,便能將運行於Linux中的threads分為kernel threads與user threads。Kernel thread經由Linux或其驅動程式呼叫kernel function kernel_thread而產生出來負責處理作業系統中的雜事2直到有人將電腦關機,User thread則通常藉由應用程式呼叫fork API而產生出來提供特定功能3,使用者可以在任何時候結束它的運行。由於Linux隨時需要檢視所有threads的特徵,將這些特徵存放在記憶體中是避免降低作業系統效能4的辦法。
Memory與threads一樣被區分為兩個區塊:kernel space memory與user space memory。Kernel space memory存放與系統運作相關的資訊5,user space memory則為一般應用程式自由運用。此外Linux也採用virtual memory以有效運用記憶體並降低開應用發程式的困難度6。
Kernel thread與user thread都會有需要外來資訊的時候,外來資訊可能是作業系統中另一個thread所傳遞的資料,也有可能是外界硬體所傳遞的訊號,而Linux利用interrupt機制告知一個thread該處理外來資訊。
由以上介紹得知Linux的主要構成要素與功能有:
- Process management --> 允許多工環境
- Scheduler --> 允許多工環境
- Memory management --> 管理資訊站存區
- Interrupt handler --> 處理外部訊號
1 PID,PPID,優先順序。。。等資訊。
2 記憶體管理,工作排程。。。等雖雜但是很重要的事務。
3 瀏覽器,文字編輯器,影音撥放程式。。。等程式都屬於user thread。
4 從使用者的觀點來看,作業系統的效能取決於task response time。
5 task_struct,interrupt description table,page description table。。。等資訊。
6 每個程式的進入點/位址都是一樣的,無須於執行時再另行計算。
Monday, June 09, 2008
Browse/Trace Code With Vim And Cscope
我們在6/3介紹使用網頁介面的cross reference trace Linux source code[1],該方法為cross reference建立資料庫時需要大量的時間(動輒數小時),如果想要在短時間內即可開始trace code,可以考慮採用tags系統的trace code方式。本篇要介紹的cscope[2]理念上延續ctags[3]使用tags方式在原始碼中搜尋關鍵字或函式的definition。如果同樣 一個definition出現在兩個以上的檔案中,ctags[3]預設直接開啟第一個檔案,如果遇到如Linux kernel針對許多部同硬體架構撰寫的原始碼,ctags[3]搜尋到的第一個match不一定是我們需要的檔案,這個部份cscope[2]則以提供 match清單的方式供使用者選擇該開啟哪個match所對應的檔案。採用cscope的另一個原因是它與編輯器vim搭配良好,操作起來十分順手。
以下為使用vim + cscope trace code的簡易範例。
1) 安裝vim與cscope套件:
$ sudo aptitude install vim vim-common vim-runtime cscope
2) 建立tags:
$ cd ~/src/linux-source/v2.6.24.3
$ cscope -bkqRU
3) 修改vim設定內容:
$ vim ~/.vimrc
在檔案最後加上以下內容:
set cscopetag
cscope add cscope.out
存檔後離開vim編輯器
4) 開始trace code
在Linux source的最頂層目錄,也就是此範例的~/src/linux-source/v2.6.24.3中啟動vim輸入:
:cs find g start_kernel
便會得到一個清單,此時從清單中挑選正確的match(取決於硬體架構,編譯核心時的define值等等),如下圖: 假設我們有興趣的match為init/main.c,輸入4之後vim便會開啟相對應的檔案並且自動將由標移至函式開頭,
此時我們就可以開始trace code,畫面如下圖。 在trace code的過程中如果對某個變數或函式感到興趣,可以使用"ctrl+]"的組合鍵取得另一份供我們選擇檔案的清單,等我們看完之後可以使 用"ctrl+t"的組合鍵回到原來的檔案繼續檢視start_kernel函式的內容。當"ctrl+]"無法找到你感興趣的關鍵字時,可以使 用":cs find"指令進行搜尋,使用":cs help"可以查閱
cscope在vim環境中所支援的搜尋指令,如下圖:
[1] http://memyselfandtaco.blogspot.com/2008/06/technical-writings-rule-of-thumb-local.html
[2] http://cscope.sourceforge.net/
[3] http://ctags.sourceforge.net/whatis.html
Thursday, June 05, 2008
Debugging Linux Kernel Without KGDB Patch (Qemu + GDB)
1) Get Linux kernel source code & Qemu package
要debug Linux kernel首先當然要先拿到原始碼,可以從官方網頁取得[1],也可以從package repository取得,如[2]中第十個步驟所述。
安裝Qemu套件的指令為:
$ sudo aptitude install qemu qemu-launcher qemubuilder qemuctl
2) Prepare Qemu disk image
接下來是設定debug環境,由於我們借助Qemu進行kernel debugging,因此首先要建立Qemu的磁碟映像檔。
此範例將Qemu disk image存放於~/Qemu中(請先行建立此資料夾),命名為kernel-hacking,容量為1000MB,完整路徑為:
~/Qemu/kernel-hacking
3) Prepare debugging environment
磁碟準備好之後我們需要在磁碟中安裝minimum install的Linux,在這裡我們需要下載debian的安裝光碟[4]。
等安裝光碟下載完成之後就可以使用Qemu launcher指定使用CD-ROM開機,當然要記得將CD-ROM指到剛剛下載的安裝光碟。
為了壓低硬碟使用量,安裝過程中我們只要選擇安裝base system即可。安裝完畢之後將開機選項改為使用硬碟開機再重新開機確認安裝完成。
完成此步驟的用意是方便以後置換target Linux kernel (要被debug的Linux kernel)
4) Compile target Linux kernel
* 以下的所有步驟都在原本的機器上進行,非Qemu中。
現在我們要準備編譯即將被debug的Linux kernel,假設我們將Linux kernel source解壓縮至"~/src/linux-source/v2.6.24",而目前正在運行的Linux版本為2.6.24-18。
首先我們需要設定kernel,指令為:
~/src/linux-source/v2.6.24$ cp /boot/config-2.6.24-18-generic .config
~/src/linux-source/v2.6.24$ sudo aptitude install ncurses-dev kernel-package build-essential
~/src/linux-source/v2.6.24$ make menuconfig
設定畫面看起來會像下面這張圖:
我們先到選單最下面選擇Load an Alternate Configuration File,讀取.config中的預設值。
接著在介面中先選擇進入Device Drivers,先將ATA/ATAPI/MFM/RLL support設定為編入kernel中(按空白鍵改變模式直到看到"*"符號)再選擇它(利用TAB鍵將由標移到Select上按Enter)進入下一層選單將Enhanced IDE/MFM/RLL disk/cdrom/tape/floppy support設定為編入kernel中,接著將Include IDE/ATA-2 DISK support也設定為編入kernel中。
最後回到最上層的目錄選擇進入File systems將Ext3 journalling file system support設定為編入kernel中。
現在離開make menuconfig的操作介面,離開時可以選擇儲存設定檔。
將Device Drivers與File systems的那些選項編入kernel中的好處是我們在稍後的作業中可以省去製作ramdisk [5]的步驟。
在編譯kernel之前先將Makefile打開:
~/src/linux-source/v2.6.24$ vim Makefile
將EXTRAVERSION = .3 --改為--> EXTRAVERSION = .3-Qemu
方便之後開機時辨識。
完成以上程序之後便可以開始編譯target Linux kernel,指令為:
~/src/linux-source/v2.6.24$ make
稍微等待一陣子之後我們便可以在~/src/linux-source/v2.6.24/arch/x86/boot下找到bzImage,這便是我們的 target Linux kernel,而我們可以將存在於~/src/linux-source/v2.6.24/下的vmlinux視為稍後debug過程中使用到的 symbol table。
5) Copy target Linux kernel to Qemu disk image
現在我們先在家目錄下建立名為tmp的空資料夾,然後將Qemu disk image掛載到tmp上讓我們可以將步驟4最後產生出來的target Linux kernel複製到Qemu disk image中並且修改掌控開機選單的menu.list,指令為:
~/src/linux-source/v2.6.24$ mkdir ~/tmp
~/src/linux-source/v2.6.24$ sudo mount -o loop,offset=32256 ~/Qemu/kernel-hacking ~/tmp
~/src/linux-source/v2.6.24$ sudo cp arch/x86/boot/bzImage ~/tmp/boot/bzImage-2.6.24.3
~/src/linux-source/v2.6.24$ sudo vim ~/tmp/boot/grub/menu.list
在menu.list中(放在## ## End Default Options ##的下一行)新增:
title Qemu Linux, kernel 2.6.24
root (hd0,0)
kernel /boot/bzImage-2.6.24.3 root=/dev/hda1 ro
savedefault
存檔離開之後啟動Qemu launcher選擇使用硬碟開機,開機的時候選擇剛剛複製的Qemu Linux, kernel 2.6.24,開機完成之後輸入uname -a確認版本無誤,如下圖:
6) Attach GDB to Qemu
最後一個步驟是開啟Qemu並讓它等候GDB連線進行除錯,開啟Qemu launcher之後點選Emulator頁面,在Additonal arguments中輸入-S -s如下圖:
點選Launch之後會看到名為QEMU [Stopped]的新console出現,如下圖:
這時候在剛剛編譯target Linux kernel的那個console中輸入指令:
~/src/linux-source/v2.6.24$ gdb ./vmlinux
以下為進入GDB之後的指令對話:
(gdb) target remote localhost:1234
Remote debugging using localhost:1234
0x0000fff0 in ?? ()
(gdb) c
Continuing.
Continuing出現之後原本一片漆黑的QEMU [Stopped]視窗開始運作最後出現kernel選單,如下圖:
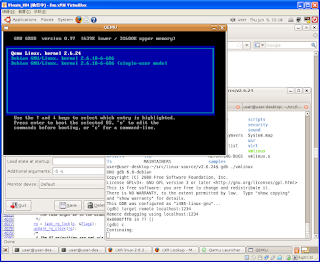
若是在GDB環境中在最後一個指令c之前插入設定breakpoint指令如b start_kernel,則在我們選擇kernel版本之後Qemu會停在start_kernel函式的第一行程式碼,如下圖:
恭喜你已經可以進行source code level Linux kernel debugging!
[1] http://www.kernel.org/
[2] http://memyselfandtaco.blogspot.com/2008/06/technical-writings-rule-of-thumb-local.html
[3] http://memyselfandtaco.blogspot.com/2008/06/qemu-and-its-launcher.html
[4] http://cdimage.debian.org/debian-cd/4.0_r3/i386/iso-cd/debian-40r3-i386-CD-1.iso
[5] http://www.ibm.com/developerworks/linux/library/l-initrd.html
Wednesday, June 04, 2008
Qemu And Its Launcher
最近為了再度開啟Linux hacking生涯而重新安裝Qemu[1],這次安裝Qemu的時候一起將Qemu launcher裝起來試用。有了Qemu launcher我們就可以告別以往在terminal透過下指令的方式啟動guest os,現在可以在Qemu launcher所提供的UI介面下修改guest os的參數設定,例如指定特定的磁碟映像檔,是否要掛載光碟機,要配置多少記憶體等等。除了網路設定之外一切都顯得相當容易,由於目前hacking Linux kernel暫時不會與網路扯上關係因此就先跳過網路設定的部分直接使用。
[1] http://bellard.org/qemu/
[2] "-s"為等候GDB由port 1234建立連線後進入除錯模式
Tuesday, June 03, 2008
Technical Writing's Rule Of Thumb + Local Web based Code Cross Reference (eg. LXR clone)
----- Begin Update Block @ 8th Jun 2008 -----
將以下"/home/user/"開頭的路徑一律改為"~/"開頭,config檔中的路徑除外。
----- End Update Block @ 8th Jun 2008 -----
寫技術文件並非多高深的學問,只需要記住幾個要點就可以寫出易懂的文件。
*永遠假設讀者什麼都不懂(eg. not only rookies but DUMMIES!)
*完整地敘述scenario(eg. what is our goal, where are we, what are the problems, what needs to be done)
*提供可複製的做法,讓dummies看了之後即便不加思索地照做也能得到正確的結果(just like report bugs)
我相信很多人都聽過以上的論點,尤其是寫過論文的人[1],老闆在review paper的時候還會不停地耳提面命。
然而在opensource界的人大都不太喜歡寫document,"Read the code, everything is in it!" they said。
因此造成一般人,同時也是大部分的人,在嘗試安裝/設定某些opensource package的時候時常覺得不知所措,例如Linux Cross Reference (LXR)採 用的LXRng系統[2],雖然有善心人士提供安裝文件[3],但是仍舊不夠直覺,我們在安裝的時候仍然需要花點時間摸索與猜測。接下來的版面將融合 [3]中的兩篇安裝文件(順便中文化),讓想要在本機端建立code cross reference的人可以無痛安裝LXRng。
讓我開始練習本文開頭所提到的幾個要點!
*永遠假設讀者什麼都不懂
-- 什麼是LXRng
LXRng原本是一套用來替Linux原始碼產生網頁介面cross reference(之後簡稱XR)的套件[4],稍加修改設定之後便可替任何軟體專案產生XR以便trace/browse code,如頁面[2]除了Linux以外也列出如Mac OS X與Perl等專案的XR。LXRng可以直接使用version control的repository(方法一)[5]也可以利用已經存在於本機硬碟上任一存放source code的目錄(方法二)產生XR[6]。
*完整地敘述scenario
-- what is our goal
常常在登入LXR官方網頁時發現該站正在維護中因而無法使用該網站trace code,而維護時間有時長達兩天,因此想要在Linux環境中安裝LXRng替Linux原始碼產生XR方便隨時查詢原始碼[7]。
-- where are we
本文件中的指令與套件名稱以Ubuntu 8.04 (Hardy)提供的為基準,範例使用的登入帳號為user。
----- Begin Update Block @ 6th Jun 2008 -----
搭配至少512MB的記憶體,有人(moiamond at gmail dot com)反應使用256MB記憶體會無法成功製作XR,程式會在進度到達100%之前就結束並沒有顯示任何錯誤訊息。
----- End Update Block @ 6th Jun 2008 -----
-- what are the problems
該安裝哪些額外的套件?該如何設定?
-- what needs to be done
1) LXRng使由許多package[8]建構而成,因1此想當然爾我們必須安裝相關套件,安裝指令為:
$ sudo aptitude install git-core postgresql-8.3 postgresql-client-8.3 libxapian15 libsearch-xapian-perl apache2 libapache2-mod-perl2 libcgi-simple-perl libcgi-ajax-perl libhtml-parser-perl libtemplate-perl libterm-progressbar-perl libdevel-size-perl libdbd-pg-perl ctags
2) 替資料庫新增擁有最大權限的使用者帳號[9],指令為:
$ sudo -i
$ su - postgres
$ createuser user # Answer "yes" when asked about superprivileged access
$ exit
$ exit
3) 替即將要產生的XR建立資料庫,並將http服務使用者[10]設定為該資料庫的一般使用者,因此在建立www-data帳號遇到任何問題都回答"N",指令為:
$ createdb lxrng
$ createuser www-data
4) 由LXR的repository取得LXRng,指令為:
$ cd ~
$ git-clone git://lxr.linux.no/git/lxrng.git
5) 開啟LXRng設定檔,指令為:
$ cd ~/lxrng
$ cp lxrng.conf-dist lxrng.conf
$ vim lxrng.conf
6) 將以下的行數加以註解
use LXRng::Repo::Git;
my $gitrepo = LXRng::Repo::Git
->new('/var/lib/lxrng/repos/linux-2.6/.git',
release_re => qr/^v[^-]*$/,
author_timestamp => 0);
my $search = LXRng::Search::Xapian->new('/var/lib/lxrng/text-db/linux-2.6');
7) 加入以下指令:
use LXRng::Repo::Plain;
my $plainrepo = LXRng::Repo::Plain->new('/home/user/src/linux-source'); [11]
my $search = LXRng::Search::Xapian->new('/home/user/src/linux-source-2.6.24-textdb'); [12]
8) 修改下列行數:
'repository' => $gitrepo, --改為--> 'repository' => $plainrepo,
'base_url' => 'http://lxr-test.linpro.no/lxr', --改為--> 'base_url' => 'http://localhost/lxr', [13]
'cache' => '/var/lib/lxrng/cache', --改為--> 'cache' => '/home/user/lxrng/cache', [14]
'ver_list' => [$gitrepo->allversions], --改為--> 'ver_list' => ['v2.6.24'],
'ver_default' => 'v2.6.20.3', --改為--> 'ver_default' => 'v2.6.24',
9) 存檔後離開編輯器(vim in this example)
10) 取得Linux source code並將目錄結構設定成與步驟7, 8中的設定相符合,指令為:
$ sudo aptitude install linux-source-2.6.24
$ mkdir ~/src
$ cp /usr/src/linux-source-2.6.24.tar.bz2 ~/src
$ cd ~/src
$ tar xjf linux-source-2.6.24.tar.bz2
$ mkdir linux-source
$ mkdir linux-source/v2.6.24
$ mv linux-source-2.6.24/* linux-source/v2.6.24
$ mkdir linux-source-2.6.24-textdb
$ mkdir ~/lxrng/cache
$ chmod 777 ~/lxrng/cache -R
$ chmod 777 ~/lxrng/webroot -R
$ make -C ~/lxrng/webroot/.static/gfx
11) 產生Linux-2.6.24的XR[15],指令為:
$ cd ~/lxrng
$ ./lxr-db-admin linux --init [16]
$ ./lxr-genxref linux
12) 設置Apache2
$ cp apache2-site.conf-dist-mod_perl apache2-site.conf
$ sudo ln -s ~/lxrng/apache2-site.conf /etc/apache2/sites-enabled/010-lxrng
$ vim apache2-site.conf
將所有@@LXRROOT@@替換成/home/user/lxrng
將@@LXRURL@@替換成lxr
13) 重新啟動Apache2
$ sudo /etc/init.d/apache2 reload
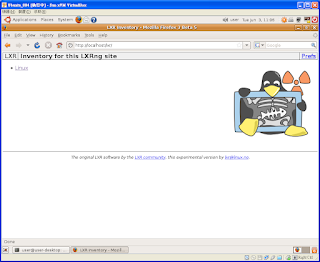
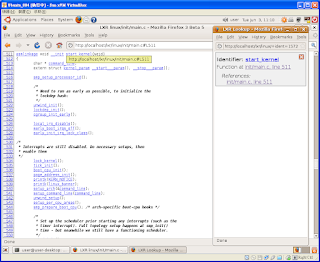
14) 使用瀏覽器開啟http://localhost/lxr即可開始查詢原始碼,如以下screenshots:
----- Begin Update Block @ 10th Jun 2008 -----
如果要更換domain name,如將現有的"localhost"改為"somewhere.com",只需要將"lxrng.conf"中的"base_url"替換之後再執行./lxr-genxref linux即可,這次的執行時間十分短,因為XR都已經存在,現在就可以使用瀏覽器開啟新的網址"http://somewhere.com/lxr"瀏覽原始碼。
----- End Update Block @ 10th Jun 2008 -----
PS. 目前仍無法產生pdf檔案,待研究
[1] 寫論文要遵守的規則當然不只如此
[2] http://lxr.linux.no/git
[3] Thanks to Ahmed: http://darwish-07.blogspot.com/2008/02/howto-lxrng-on-ubuntu-710.html
Thanks to Fred: http://lxr.linux.no/.static/contrib/lxr-notes-ubuntu.txt
[4] http://lxr.linux.no/git/linux
[5] 目前似乎僅支援GIT,文件中並沒有提及其他的protocol
[6] 我目前僅成功使用本機專案產生XR,直接使用GIT's repository則會得到"Nothing to do"的訊息
[7] 本篇僅說明如何使用方法二產生XR
[8] Perl, CPAN, PostgreSQL, Xapian and Excuberant Ctags
[9] 與目前Linux登入帳戶相同,因此在此範例為user
[10] Ubuntu的預設值為www-data
[11] 存放原始碼的目錄
[12] 存放XR的目錄
[13] XR的URL
[14] XR運作時存放cache的目錄
[15] 在我的VM中跑了將近五個小時
[16] 指令中含有linux是因為lxrng.conf中的標籤設置為linux,設定碼為:'linux' => {


