今天跟chtsai與信安一行人到台北市立美術館看pixar 20周年展覽,沒想到人超多,買預售票還要排大概一小時,現場買票要等兩小時~
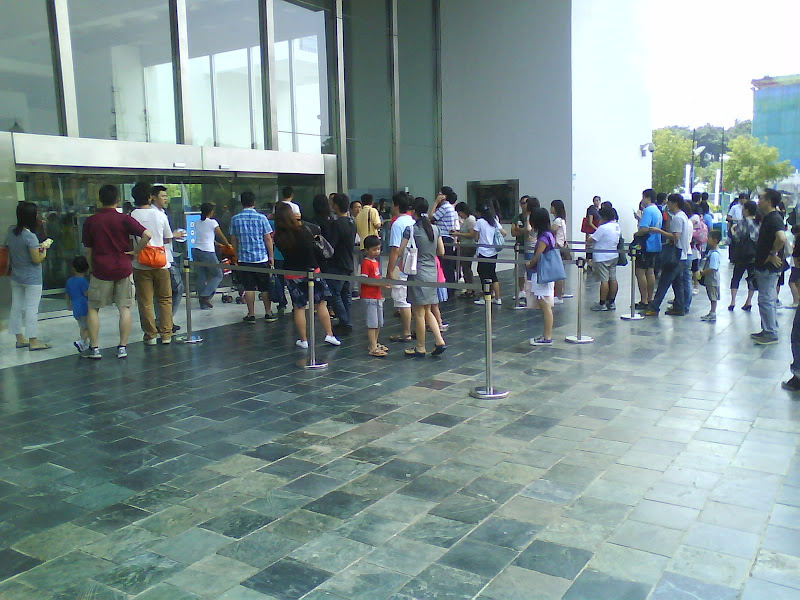
整個展覽中我最喜歡的是那些上面寫滿密密麻麻註記的手稿,還有製作流程的說明影片,感覺上跟我們做系統文件差不多,只是歡樂多了!為了不破壞各位參觀的興致,就不說得太仔細了,不過當然要不免俗地放一些在入口及出口拍的紀念照。


最後推薦大家去看看,可以晚一點再去,如果堅持要現在(週末)去的話就要做好跟一堆人擠&排隊的心理準備~
Sunday, August 16, 2009
Tuesday, August 11, 2009
tar + exclude
長久以來都是整個目錄tar起來,還沒有真的用過exclude功能,嘗試了一下之後發現exclude除了要帶路徑之外還要再加上個*,不然想exclude的路徑一樣會被tar起來。
這樣子是不會work2的:
tar czf auto_import.tar.gz --exclude="auto_import/csv_files/" --exclude="auto_import/tmp_csv/" auto_import
這樣子才對:
tar czf auto_import.tar.gz --exclude="auto_import/csv_files/*" --exclude="auto_import/tmp_csv/*" auto_import
Monday, August 10, 2009
擴充sqlldr的容錯值
使用sqlldr將資料倒進DB的時候Oracle預設只要遇到50比錯誤的資料就會停止import,若想將容錯值擴充為大於50,可以使用errors這個參數,範例如下:
/u01/app/oracle/product/10.2.0/db_1/bin/sqlldr control=./ctl_files/vp_tb_vasmd_cdrinfo.ctl errors=10000000 log=./log_files/vp_tb_vasmd_cdrinfo.log userid=foak/qazwsx direct=true
Sunday, August 02, 2009
Use Google Spreadsheet as DB
每天都有新鮮事!
今天的新鮮事則是發現可以把Google spreadsheet拿來當作DB用~
下面兩個links有蠻詳盡的說明:
http://ouseful.wordpress.com/2009/05/14/querying-a-google-spreadsheet-of-mps-expenses-data-so-who-claimed-for-biscuits/
http://ouseful.wordpress.com/2009/05/18/using-google-spreadsheets-as-a-databace-with-the-google-visualisation-api-query-language/
我在試的時候發現如果想要用修改URL方式將spreadsheet拿來當作DB用,光是到spreadsheet的[Share]中設定Get the link to share...將view與edit權限開給所有人還不夠,還要publish spreadsheet,不然就會有access denied的錯誤訊息。
下面就貼個範例好了:
Publish之後的spreadsheet --> http://spreadsheets.google.com/pub?key=tsaL9uDLIVQLQup8e-67sjw
加上DB query --> http://spreadsheets.google.com/tq?tqx=out:html&tq=select%20A,B,C%20where%20A%20contains%20'PHP'%20order%20by%20A&key=tsaL9uDLIVQLQup8e-67sjw
PS. 不過這畢竟不是真的DB,所以有些statement要改一下,例如LIKE要改成CONTAINS,然後statement中的欄位名稱要用spreadsheet裡的ABCD,有點不太人性化,但是對於完全不想要自己架(或找DB)server的狀況下可以藉由spreadsheet來做到動態網頁。
Saturday, July 25, 2009
putty tunnel
本篇為log...
如果辦公室有擋特定網頁或是即時通訊軟體,如果不算現在正流行的3G網卡(在地下室就收不到訊號了),通常的解決方式是拿家裡的一台電腦來裝VPN server或是用putty開個tunnel做跳板,我因為懶得研究VPN server怎麼設定,所以決定採用我熟悉的putty~
已經有很多網頁在說明如何設定putty,所以就不浪費網路資源了:
http://cha.homeip.net/blog/archives/2006/01/putty_ssh_tunne.html
但是除了設定putty外,要拿來當跳板的電腦還要有個proxy,這個部份也已經有很多網頁說明:
http://www.ubuntugeek.com/how-to-setup-transparent-squid-proxy-server-in-ubuntu.html
當proxy server安裝設定完畢,putty也設定好之後便可利用跳板自由的瀏覽網頁&使用msn,而且還不需要擔心被竊聽,但是前提是port要有開。。。
所以最後要再加個簡易的掃port教學網頁:
http://www.cyberciti.biz/faq/linux-port-scanning/
Tuesday, June 30, 2009
山不轉路轉
上一篇寫到要如何用Network Namespaces + Vconfig來做到只用一台電腦與一張PCI網卡就可以監控使用相同IP網段的多個VLAN,結果發現從獨立namespace發出帶有VLAN ID的封包始終無法成功的送到網路上,經過整整一個星期的思考,在iptables & ip route之間穿梭,卻找不到一個可以把封包丟出去的方法。。。
在我勤奮不懈的努力之下,洗澡的時候忽然有個"Multiple routing table"的想法閃過腦中,於是踏出浴室之後馬上google Linux是否有這種東西&要怎麼用,話說天救自救者,就這樣給我試出來了,哇哈哈哈!
有興趣的人可以用下面的script試一下:
+--NS2:------------------------------------------------
./ns_exec -nm -- /bin/bash
echo $$
+------------------------------------------------------
+--NS3:------------------------------------------------
./ns_exec -nm -- /bin/bash
echo $$
+------------------------------------------------------
+--NS1:------------------------------------------------
ip link add type veth
ip link add type veth

ip link set veth1 netns 1691
ip link set veth3 netns 1704

ifconfig veth0 192.168.0.1/24 up
ifconfig veth2 192.168.2.1/24 up

vconfig add eth0 11
vconfig add eth0 33

ifconfig eth0.11 10.0.0.11/24 up
ifconfig eth0.33 10.0.0.33/24 up

echo 1 > /proc/sys/net/ipv4/ip_forward
echo 1 > /proc/sys/net/ipv4/conf/eth0/proxy_arp

ip rule add from 192.168.0.2 lookup 102
ip rule add from 192.168.2.2 lookup 122

ip route add default via 10.0.0.11 dev eth0.11 table 102
ip route add default via 10.0.0.33 dev eth0.33 table 122
+------------------------------------------------------
+--NS2:------------------------------------------------
ifconfig veth1 192.168.0.2/24 up
ip route add default via 192.168.0.1 dev veth1
+------------------------------------------------------
+--NS3:------------------------------------------------
ifconfig veth3 192.168.2.2/24 up
ip route add default via 192.168.2.1 dev veth3
+------------------------------------------------------
+--NS1:------------------------------------------------
tcpdump -ne -i eth0 not port 22
+------------------------------------------------------
tcpdump擷取到的封包資訊:
[root@vmf11 ~]# tcpdump -ne -i eth0 not port 22
tcpdump: verbose output suppressed, use -v or -vv for full protocol decode
listening on eth0, link-type EN10MB (Ethernet), capture size 96 bytes
10:51:41.882589 00:0c:29:56:fb:d3 > Broadcast, ethertype 802.1Q (0x8100), length 46: vlan 11, p 0, ethertype ARP, arp who-has 10.0.0.10 tell 10.0.0.11
10:51:42.326170 00:0c:29:56:fb:d3 > Broadcast, ethertype 802.1Q (0x8100), length 46: vlan 33, p 0, ethertype ARP, arp who-has 10.0.0.10 tell 10.0.0.33
看到了嗎?
問相同IP地址的封包被加上不同的VLAN ID了!
Tuesday, June 23, 2009
Linux Container (Network Namespaces) + 802.1q (vconfig) + screen
今天要作筆記的對象是Virtual VLAN interface,虛擬化已經從最早的虛擬電腦(Vmware/Virtual PC/Qemu/Virtual box/Xen/KVM...etc)演進到虛擬switch(Virtual route forwarding enabled switch),虛擬的的Network interface其實也存在好一陣子(eg. IP alias),不過虛擬的VLAN interface倒是很少見。
雖然在2004年有人寫了個linux-vrf的patch,讓我們在Linux下可以透過chvrf這個工具指定某個process要透過哪張虛擬的VLAN interface對外丟封包,只不過該patch只支援到2.6.8版的Linux kernel(等同於Fedora Core2時代),那麼新版的Linux用戶該怎麼辦呢?沒關係,待我細細道來。
首先要先介紹Linux Container&802.1q support in Linux kernel。
簡單來說Linux Container是用來讓每個process有獨立的作業空間,這裡我們只用到獨立network interface的功能,802.1q support in Linux kernel則是讓使用者有能力創建支援VLAN tag的network interface,因此把這兩個功能相加之後便可以達到虛擬VLAN interface的功能,下面兩個連結有更詳盡的說明與tutorial:
Linux Container
Linux Container configuration guide中所提到的ns_exec工具可以用下面指令取得:
git clone git://git.sr71.net/~hallyn/cr_tests.git
802.1q support in Linux kernel
看完上面兩個連結之後,我們知道怎麼為各作業空間建立獨立的virtual network interface,也知道怎麼建立能夠發出帶有VLAN tag封包的virtual network interface,但是,如果我們想要用一台主機跟多個VLAN裡面的設備溝通時該怎麼辦呢?
答案就是在建立完veth之後再用vconfig在veth上面另外長個VLAN tag enabled network interface!
設定可以參考下面的script,這個例子用到screen來達到完全自動化(while-loop裡面可以再改進),在一般bash shell下執行script,而script中使用screen -X下達指令的對象為另一個bash shell中的screen,而兩個bash shell都必須使用root登入:
echo 1 > /proc/sys/net/ipv4/ip_forward

echo 1 > /proc/sys/net/ipv4/conf/eth0/proxy_arp

ip link add type veth

ifconfig veth0 192.168.0.101/24 up

route add -host 192.168.0.102 dev veth0

echo 1 > /proc/sys/net/ipv4/conf/veth0/proxy_arp


screen -X stuff './ns_exec -nm -- /bin/bash'

screen -X eval 'stuff "\015"'

sleep 1

screen -X stuff 'echo $$ >> pid'

screen -X eval 'stuff "\015"'


val=1;

while read line

do

        echo $val $line;

        veth=veth$val;

        ip link set $veth netns $line;

        #cmd='ifconfig veth1 192.168.0.102/24 up';

        #echo $cmd;

        #screen -X stuff $cmd;

        screen -X stuff 'ifconfig veth1 192.168.0.102/24 up';

        screen -X eval 'stuff "\015"'

        screen -X stuff 'vconfig add veth1 11';

        screen -X eval 'stuff "\015"'

        screen -X stuff 'ifconfig veth1.11 10.0.0.1/24 up';

        screen -X eval 'stuff "\015"'

        screen -X stuff 'ip route add default via 192.168.0.102 dev veth1';

        screen -X eval 'stuff "\015"'

        val=`expr $val + 2`;

done < "pid"


echo finish startup
Saturday, June 13, 2009
Wednesday, April 01, 2009
檔名過長怎麼辦?
今天遇到個很機車的問題,因為檔案名稱/路徑過長而無法刪除,試著rename但是連rename都失敗,如下:
C:\Program
Files\IBM\WebSphere\AST\updater\workspace\proxies\eclipse\features\up
dater.ast.fixpack.constellation.1005_1.0.0\backup\files\eclipse\plugins\com.ibm.
datatools.db2.luw.serverdiscovery_1.0.0.v200610132104\com\ibm\datatools\db2\luw\serverdiscovery>move model* a
檔名或副檔名太長。
還好找到這篇blog解救了我,始用到的是方法三:
方法3
首先先挑一個沒在用的磁碟機編號,例如 T
subst T: .
T:rename "thisisafuckinglongfile andyoucantopenit.jpg" new.jpg
C:
subst T: /d
注意第一行最後一個字元是 .
代表現在的資料夾這樣一來路徑就縮到最短了再執行rename最後一行是關掉虛擬磁碟
Tuesday, February 03, 2009
Oracle 10g and SQuirrel SQL
是的,今天要討論的是題目就是建立Oracle 10g database然後用免費的SQuirrel SQL連線進行檢視或修改。
安裝Oracle 10g十分容易因此不在這裡贅述,唯一要說明的是只要安裝Oracle 10g即可,不要勾選"建立起始資料庫",這樣可以節省不少空間。
安裝完之後點選
[開始] -> [所有程式] -> [Oracle - OraDb10g_home1] -> [組態設定核轉移工具] -> [資料庫組態輔助程式] (aka. DBCA)
有了這個幫手讓建立資料庫不再是難事,google上有很多介紹如何使用command line建立資料庫的連結,實際上跟著做過之後就會發現其實手續十分繁雜~
花點腦筋依序按下"下一步"之後資料庫就建立好了,這裡要注意的是請記得SID,之後的很多地方都會用到。
資料庫建立好了不代表我們現在就可以連到資料庫,接著我們需要建立並設定Network Listener(網路監聽器)。
請點選
[開始] -> [所有程式] -> [Oracle - OraDb10g_home1] -> [組態設定核轉移工具] -> [網路組態輔助程式] (aka. NETCA)
我們需要執行"網路組態輔助程式"兩次,第一次設定網路監聽器,第二次是設定區域網路服務名稱,在兩次的組態過程中請在"網路監聽器"與"服務名稱"中填入SID。
接著follow下面的link設定SQuirrel SQL。
http://www.norgesinternettforum.no/archive/index.php?t-1935.html
quote:
1. add the oracle driver其中有幾個地方可以修改一下:
drivers > new driver
click on the Extra Class Path tab and press the button Add
browse to find the file on your hard drive called ojdbc14.jar
on my machine i had it in the weblogic installation directory, here:
/usr/bea/weblogic81/server/lib
Name: oracle 9 driver
Example URL: jdbc:oracle:thin:@10.0.0.150:1521:myoracledb
Website URL: http://oracle.com
Class Name: oracle.jdbc.driver.OracleDriver
the italicized texts are up to you what you write there. i got our information from this file on our bea server:
/usr/bea/user_projects/domains/myapp/config.xml
2. make the connection
aliases > new alias
Name: oracle 9 driver connection
Driver: (choose oracle 9 driver from the dropdown list)
User name: scott
Password: tiger
OK
highlight oracle 9 driver connection in the alias window and push the connection button or do the keyboard combination control+o
push the connect button
- "Oracle Thin Driver"即可,不需要新增一個新的driver名稱。
- 連線的時候把User Name從連結中的scott改成system,密碼就是建立資料庫時輸入的密碼。
連上資料庫之後到SQL tab使用create user與grant user的SQL指令新增資料庫的使用者,
或者如下面link的第一項。
http://life.iiietc.ncu.edu.tw/xms/forum/show.php?id=3337
quote:
1.login user: system
(1) --建立一個user名稱test01(CREATE USER test01)密碼預設為test01(語法:IDENTIFIED BY test01)
CREATE USER TEST01 IDENTIFIED BY test01 ;
(2) --賦予test01可以連接資料庫的權限
GRANT CREATE SESSION TO test01;
(3) --建立一個user test02,且賦予連線權限
CREATE USER TEST02 IDENTIFIED BY test02 ;
GRANT CREATE SESSION TO test02;
但是重點是以下這一行:
grant connect, resource to username;
[20090224]再更新一下:
ORACLE用ORACLE_SID來指定要連接到哪個DB,所以在下connect之令之前要記得先設定ORACLE_SID,在Linux的bash中用export,在Windows的"cmd"中用set。
做完這一系列的設定之後深深地發覺。。。Apache Derby在設定與使用上真是太簡單了!
Saturday, January 31, 2009


vmware-vdiskmanager -- final
避免昨天參考的連結哪天突然變成broken link,今天還是決定上來做個筆記:
[vmware-vdiskmanager的完整路徑] -x [擴充後的容量]GB [VMDK的完整路徑]
// [擴充後的容量]並不是所有的數字都可被接受,例如昨天我放20失敗,改用21嘗試後便成功
檢查/dev/下面是不是有新的sda#,sdb#,或是類似的裝置出現,接著將新增的裝置帶入下面的指令中
fdisk /dev/sda
在console的互動環境中建立新的partition(n)並將filesystem type改成LVM適用的8e,完成後
先將改變存回partition table中(w)再離開
// #為數字
// 如果直接輸入fdisk得到查無指令的訊息,請在前面加上/sbin/再試試看,以下的指令都適用
重新開機 or 執行partporbe(就不需要重開機)
pvcreate /dev/sda#
vgextend VolGroup00 /dev/sda#
// VolGroup00可能是其他名字,請執行vgdisplay然後檢視VG Name欄位
lvextend -L +XXG /dev/VolGroup/LogVol00
// 這裡的XX就藏在執行vgdisplay後得到資訊中的Free PE / Size欄位中
// 另外LogVol00請執行lvdisplay然後哪個VG Name所對應到的LV Size與原來的磁碟空間相符合
resize2fs /dev/VolGroup00/LogVol00
// 結束之後請執行df -h確認空間擴充完畢
最後做個總整理,順序是很重要的!
- vmware-vdiskmanager -->
先增加實體的檔案空間,可能是pre-allocate可能不是,但是先讓vmware知道image的limit(可以說是存取範圍)在哪裡,這個步驟跟在電腦上加個新硬碟是一樣的意思 - fdisk -->
加上新硬碟之後就要先幫新硬碟規劃partition(磁區) - pvcreate -->
告訴linux現在系統中多了新的磁區(physical volume) - vgextend -->
用新的磁區擴充現有的volume group - lvextend -->
擴充邏輯空間,單純設定新的存取範圍(logical volume) - resize2fs -->
在filesystem中將新的磁區真正納入logical volume所涵蓋的範圍
Friday, January 30, 2009
vmware-vdiskmanager -- continued
昨天使用vmware-vdiskmanager增加vmware image的容量之後其實事情還沒有結束,因為對於Linux來說有用的磁碟空間仍舊沒有改變,因為我採用LVM的方式規劃硬碟,所以參考了下面兩個連結完成增加vmware disk space的後續動作:
- http://www.global-domination.org/forum/viewtopic.php?t=750&sid=4b727581d6dbb199087becdd4c9fb31c
- http://www.swizzling.org/2008/04/01/expand-lvm-disk-on-linux-in-vmware/
- 第一個連結中寫到"Add *n*ew partition 3 as primary, change to LVM *t*ype (8e) ",這裡將新增的partition編號設定為"3",原因是fedora已經把1 & 2都用掉了~,其實如果四個ID都用完了也可以新增為extended,primary與extended的差別只在於extended不能開機。
- 第一個連結與第二個連結的最後一個步驟分別使用了"ext2online"與"resize2fs"指令,經過實驗之後只有"resize2fs"才能適用於fedora。
增加vmware image size前
[root@localhost test]# df -h
Filesystem Size Used Avail Use% Mounted on
/dev/mapper/VolGroup00-LogVol00 6.2G 3.0G 2.9G 51% /
/dev/sda1 190M 14M 167M 8% /boot
tmpfs 378M 0 378M 0% /dev/shm
增加vmware image size後
[root@localhost test]# df -h
Filesystem Size Used Avail Use% Mounted on
/dev/mapper/VolGroup00-LogVol00 19G 3.0G 16G 17% /
/dev/sda1 190M 14M 167M 8% /boot
tmpfs 378M 0 378M 0% /dev/shm
PS. 原來fedora 9之後就可以直接寫NTFS格式的硬碟了!
Thursday, January 29, 2009
vmware-vdiskmanager
之前在vmware中裝了個測試平台專門用來處理資料庫相關的嘗試與測試作業,隨著raw data與日俱增,原先設定為20G的vmware disk也不太夠用,google之後發現了增大已存在的vmware disk空間的指令與用法,現在趕快寫下來備忘一下:
"c:\Program Files\VMware\VMware Server\vmware-vdiskmanager.exe" -x 42.0Gb "c:\Virtual Machines\Red Hat Linux\Red Hat Linux.vmdk"其中的-x 42.0Gb指的是希望將原先的vmware disk增加到42Gb
PS. 要注意的是這個指令只能用在增加vmware disk上,想減少?抱歉,辦不到!儼然就像要變胖的人瘦回原先的樣子一樣 @@
Tuesday, January 27, 2009
Ironic
今天用google確認我沒有把"ironic"拼錯的時候發現了其中一個連結連到了由ALANIS MORISSETTE所演唱的Ironic,這首歌收錄在由Warner Brothers於1995年發行的JAGGED LITTLE PILL專輯中,話說當年在NZ的時候還有買過這張CD呢~
再度仔細看過歌詞之後發現不但歌曲名稱蠻符合我目前的處境,連其中的歌詞現在看來也顯得蠻貼切的:
"Well life has a funny way of sneaking up on you
When you think everything's ok and everythings going right"
(這算是傳說中的"樂極生悲"嗎?)
希望另一句歌詞能夠在不久的將來也變得貼切:
"And life has a funny way of helping you out when
You think evertyhing's gone wrong and everthing blows up
In your face "
以下附上整首歌曲的歌詞:
An old man turned ninety-eight
He won the lottery and died the next day
It's a black fly in your chardonnay
It's a death row pardon two minutes too late
Isn't it ironic... don't you think
Chorus:
It's like rain on your wedding day
It's a free ride when you've already paid
It's the good advice that you just didn't take
Who would've thought... it figures
Mr. Play It Safe was afraid to fly
He packed his suitcase and kissed his kids good-bye
He waited his whole damn life to take that flight
And as the plane crashed down he thought
"Well, isn't this nice."
And Isn't this ironic ... don't you think?
Repeat Chorus
Well life has a funny way of sneaking up on you
When you think everything's ok and everythings going right
And life has a funny way of helping you out when
You think evertyhing's gone wrong and everthing blows up
In your face
A traffic jam when you're already late
A no-smoking sign on your cigarette break
It's like 10,000 spoons when all you need is a knife
It's meeting the man of my dreams
and then meeting his beautiful wife
And isn't it ironic... don't you think
A little too ironic.. and yeah I really do think...
Repeat Chorus
Well life has a funny way of sneaking up on you
And life has a funny way of helping you out
helping you out
Sunday, January 25, 2009
新年快樂 to ALL
這是我第一次覺得在過年時許願一點也不準,記得我第一次在過年時許願是工作的第一年,當時正在準備研究所甄試,於是當然許了希望能夠順利錄取,結果也的確天從人願。
第二次許願是研究所即將畢業的時候,當時的老闆十分硬,於是便許了希望能夠順利畢業,雖然過程十分坎坷,但是結果也算是盡如人意。
第三次是入伍後,相信當過兵的人都聽過"只有平安退伍才是真的"這句話,因此我當然也許了希望能夠平安退伍,只是後來想想退伍後總該要有個工作吧?因此又多許了希望能夠找到喜歡的工作,而這兩件事情都很幸運的實現了,首先退伍時我還是個健健康康,活蹦亂跳的人,再來便是在退伍前已經確定退伍後的頭路。
難道是因為"事不過三"嗎?亦或是因為去年太貪心一次許了兩個願?還是因為這個願望從以前到現在都沒有中斷過(只是沒說出來而已)所以造成了今年決定拿出來認真許一下的願望馬上就事與願違。。。
不過該慶幸的是今天是除夕夜,過了今天又是新的一年!
人嘛,總是要向前("錢"也可以)看~
只不過似乎又要繼續一 個人度過第29個年頭了?
最後感謝大家看完以上的文字,祝大家新年快樂!
Friday, January 16, 2009
Now, Discover Your Stengths
最近在看一本名為"Now, Discover Your Stengths"的書,中文翻譯成"發現我的天才",這本書是在上次參加BTC training時同事推薦的,其中有一些蠻有趣的觀點質得大家細細品味與思考。
其中最有趣的觀點是"practices make perfect"這句話其實不完全正確,practices正確的東西(strengths)才會make perfect,practices不正確的東西(weakness)只是充其量在做損害控制而已,試問一家光做損害控制的公司怎麼可能賺錢呢?很多人喜歡拿愛因斯坦不善言詞的例子來說明"practices make perfect",但是大家都忘了愛因斯坦的成就在於E = MC2,而不是成為演說家!總之,大家有機會的話可以看看 :-)
Thursday, January 15, 2009
Tomcat & /etc/hosts
今天終於解決了一樁千古懸案 --> 啟動Tomcat之後就無法關閉。
之前一直以為是客戶IT的機車firewall規則造成的,後來在以色列同仁詢問我無法啟動Tomcat的原因時一並附上的error log中找到了關鍵字"Cannot assign requested address",上google搜尋之後發現原來是/etc/hosts沒有設定好(因為之前主機換地方所以IP也換了,但是忘了改/etc/hosts)。
至於完整解得請參考這裡
Subscribe to:
Posts (Atom)
